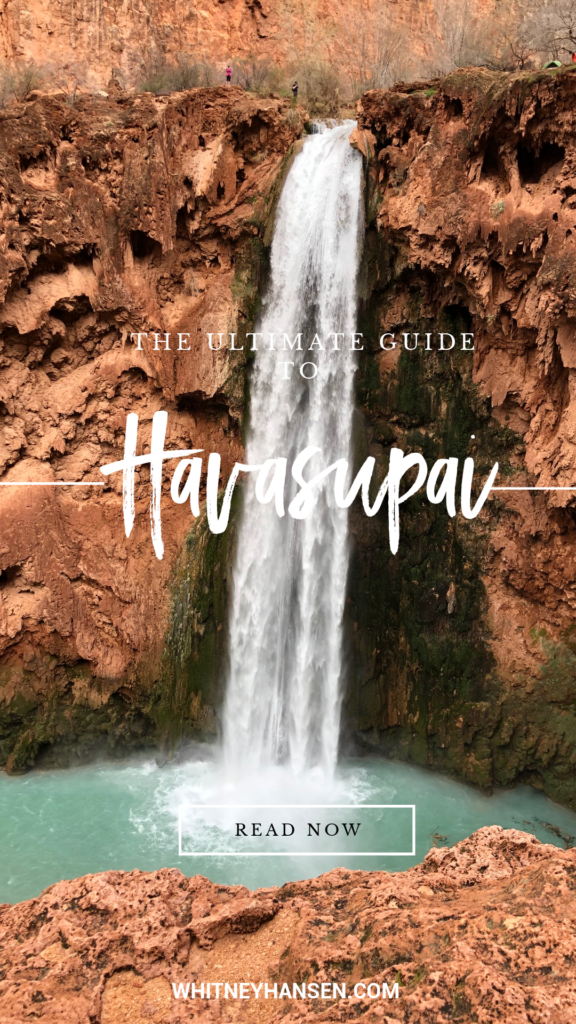
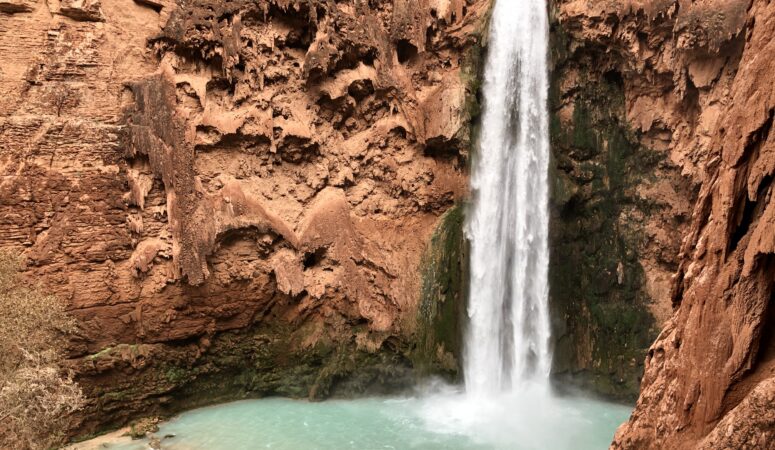
A few year ago I stumbled upon a picture of Havasupai. It was this beautiful blue waterfall with red rock canyon surrounding it.
It looked like it was photoshopped. But the more I learned about Havasupai, the more I realized this place was legitimately bucket list worthy!
So I hopped online 6 months in advance from when I wanted to go to find that ALL the permits were taken and I had to wait until the following year to get a permit.
The next year, I marked my calendar for February 1 was online right when the permits went on sale and didn’t get anything.
Two more years after that, I finally got a permit for 3 people and planned my trip to Havasupai.
It was incredible! I think everyone should go there at least once in their life, so let’s chat about how you can get your shot at exploring this magical place.
First and foremost, a HUGE thank you to the Supai people for allowing us to visit this place. They have no obligation to do so, but I’m grateful they open their land to other.
How to Get A Permit
This is by far the hardest part of the trip. If you are going with a group, make sure they are flexible with dates. We had 4 people online February 1 at 8 AM Arizona time. We were hitting refresh every few seconds and waiting for the permits to open.
This process suuuuucks. The website kept glitching and we weren’t able to see very far into the future. So out of a desperate attempt when we finally noticed there were available dates we could book without getting kicked out in February.
Our reservation dates were February 15-18, 2019.
We booked 3 spots.
Here’s a secret insiders tip:
As of last year 2019 Havasupai Reservations started a transfer list. So many people booked out of desperation and the dates no longer worked for their schedule. The transfer list is THE BEST secret to getting dates that no longer work for people and avoiding the mad dash.
You do need to create an account, but you’ll see lots of dates for 2-3 people available. You can reserve those dates from the website an have the permit transferred to your party.
How much time to spend in Havasupai
Campground reservations are only available for 3 nights, 4 days.
After collecting thousands of people’s reviews, the Havasupai Tribe have made this a minimum. Sure you can stay for less time, but you must purchase the minimum reservations.
We found this to be a good amount of time, but we actually bailed out a day early because there was a freak snow storm coming in and we needed to get out of there before we were stuck.
That was actually the best idea, it got crazy!
Here’s my recommendation for how to split that itinerary:
- Day 1: Hit the trail by 7 AM and hike 10 miles into the campground
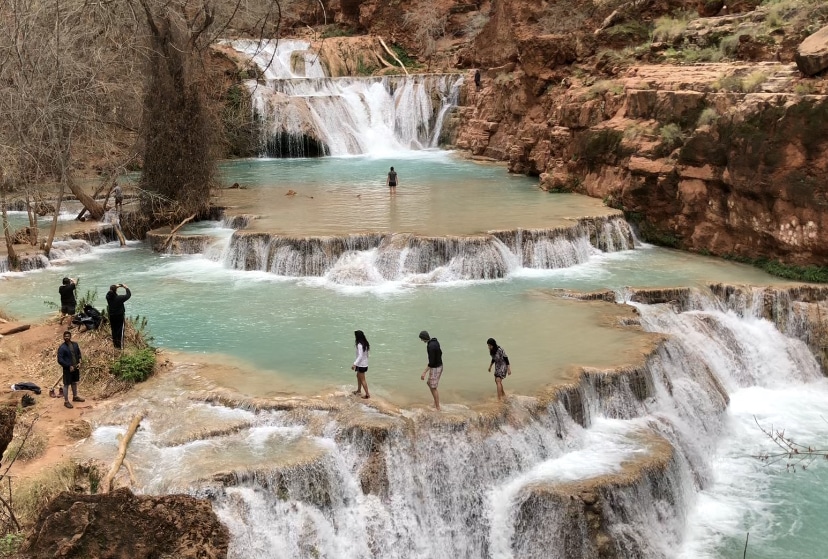
- Day 2: Hike over to Mooney Falls and continue the trek to Beaver Falls
- Day 3: Explore around campground seeing Havasu Falls, Little Navajo Falls, and relax. Meet other campers (everyone is so so friendly, if you feel like going solo you’ll be 100% fine)
- Day 4: Hike out early
This is just some good to know info- but when you hike into the village you’ll need your permit paperwork emailed over to you so you can get your wristbands. There’s usually someone halfway on the trail that checks your permits.
Check out the video below so you can see our hike and what to expect from the trail. It’s really a stunning place!
When to go to Havasupai
We went in February, which worked out really well for a couple different reasons. The hike was easier because it wasn’t as hot, and there were weren’t as many people. We legitimately felt like we had the campground to ourselves; it was awesome!
The downside to going during the colder months is that the water is quite as refreshing as it would be in the heat, but honestly, I don’t think I would have enjoyed the hike nearly as much if we went in the summer.
We were able to get into the campground in about 4 hours and hiked back out to our car in about 4.5 hours. It would have taken at least another hour each way if we went in the hot summer months.
How much does it cost to go to Havasupai
No joke, this is by far the most expensive camping trip I’ve ever been on. It is totally worth it, but very expensive. Part of our days were on a weekend and weekends are more expensive.
We paid $375 per person for our camping reservations.
I also live in Idaho and we decided to drive down to Arizona so we could spend the night before getting some rest and hit the trailhead in the morning.
We stayed at Grand Canyon Plaza Hotel in Tusayan, AZ. It was inexpensive, offered free breakfast (we also snagged some fruit and an extra bagel for our hike) and was a comfortable place.
A word of caution–there is a train that runs right by this hotel in the middle of the night. The train definitely woke me up a few times.
Other potential costs
Depending on your physical fitness abilities, you can also rent a mule to carry your gear down into the canyon. The mules cost $400 for roundtrip carrying.
I had someone in my party that paid for a mule, so we used that. I’m not going to lie to you, I felt super bad for the mule. I WOULD NOT recommend doing this. I’m sure the mules are well taken care of, but it’s hard to know for sure. So pack light and only bring what you are willing to carry in your bag.
Total Costs of My Trip:
- Pre-hike lodging: ~$120 ($40 per person)
- Gas in car (Roundtrip from Boise, Idaho): $250 ($83 per person)
- Campground Reservation: $375 /per person
- Post-hike lodging (to explore Antelope Canyon + Horseshoe Bend): ~$120 ($40 per person)
- Eating out and food while traveling: ~$80
- Backpacking Food: ~$50
- TOTAL COST: $668
PS. I’m going off of memory on some of these costs. I vaguely remember the trip being closer to $900– but that must have included the mule.
Another potential cost you might come across is the gear. Fortunately, I already had all of my backpacking gear, but if you don’t, I suggest looking into rental places. If you are flying in, remember, you can always swing by REI or Sierra Trading Post to pick up some other essentials like you’re propane for cooking.
Which leads me to my next point….
What to pack for Havasupai
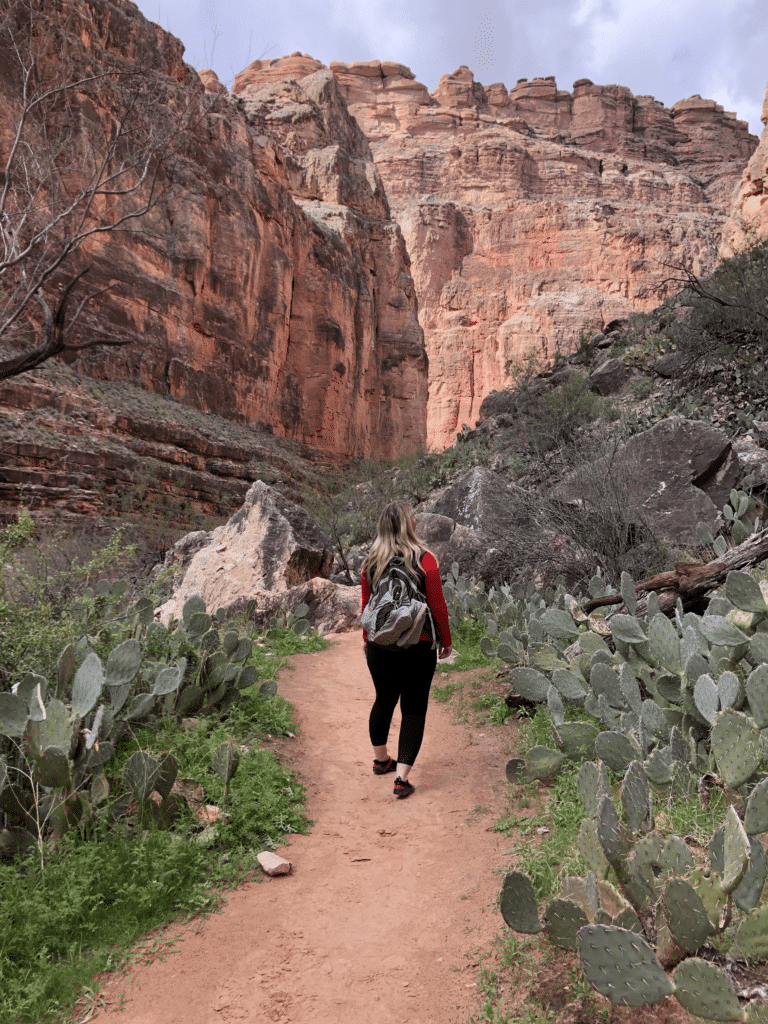
Because I went in February, the weather was unpredictable and chilly at night. I was way more concerned than I should have been about the cold. It was actually not bad at all.
Here’s what you’ll need:
Sleeping Gear + Essentials
- Printed map for each person in your party in individual ziplock baggies (just in case you need it)
- Carabiner and paracord for hanging your food (the squirrels are no joke there and will eat through your tent if you don’t hang your food– even during the day)
- 55-60 liter backpack
- Light weight tent + footprint (this is one Big Agnes one I recommend for 2 people)
- Sleeping pad (here’s my favorite- it’s lightweight and so comfy!)
- Sleeping bag (I use a quilt- it’s warm and convenient)
- Sleeping liner (if you are unsure if it will be cold at night)
- Camp pillow (or stuff sack if you would rather put your clothes in there and sleep on that)
- Hand-warmers (whenever I backpack, I bring a couple packs of hand warmers to sleep with in my bag. It makes me comfy and warm. Plus it helps if you are have period cramps, which, I unfortunately, I needed.)
- Headlamp for walking around at night- it gets pretty dark (but the stars are beautiful!)
Clothing
- 3 pair of long socks
- 1 pair of leggings (I used the same pair the whole trip- gross, I know, but it was lightweight)
- Packable down puffy coat (again, I went in February- it was chilly)
- 2 long sleeve moisture wicking shirts
- Warm hat
- Water shoes (these are everything for hiking to Beaver Falls- you’ll be crossing a lot of streams of water and it made it very convenient. These ones are less than $15.)
- PJs
- Shoes with great tread or hiking shoes (ideally broken in)
- Swimsuit
- Small packable microfiber towel (for after swimming and around camp)
Food + Cooking Gear
- Camp stove (my FAVORITE $15 cooking stove)
- Small pot for boiling water
- Spork for eating
- Coffee cup (Use this for coffee, water, oatmeal in the mornings and other meals as needed)
- Trash bag to haul everything out
- Nalgene Water bottle (there is a springs in the campground that is safe to drink from, you’ll need to make a few trips with just a Nalgene)
- Snacks for the hike (I brought Trader Joe’s dried mangos, jerky, and a couple protein bars)
- Lunch/Dinner food (my favorite is Backpacker’s Pantry Pad Thai— it’s so so good. I also brought 2 lemon pepper tuna packet for eating on the go.)
- Breakfast food (we brought oatmeal for the mornings. It was super easy and fast to just boil some water and have a warm breakfast ready to go)
- Gummy bears- gives you a quick insulin spike and a lightweight snack
- Coffee on the go packs (these are the best for camping and if you are coffee drinker, there’s nothing better than watching the sunrise with your cup of coffee in hand)
- Powdered coffee creamer (lightweight and tasty if you aren’t a black coffee drinker)
- A couple tea bags (nice for the evening to have something warm and help you sleep)
NOTE: Campfires are NOT allowed here. So don’t bring your smore’s stuff or plan to use a campfire as your cooking source.
Creature Comforts
- Nail scrub brush (trust me, you’ll want this after you are hiking in the dirt all day)
- Period supplies- For my lady friends, you might be on your period during this time like I was. So bring your pain relievers, period supplies, and hand warmers if you have cramps.
- Battery pack for charging your devices (I know you should be enjoying the great outdoors and while you won’t have service, it’s nice to charge your phone if you are using it for pictures)
- Earplugs
- Headphones (I like to use my meditation app at night and didn’t want to wake up my party)
- Rubber gloves (if you choose to make your way down to Mooney Falls. We didn’t use any gloves, but I can see why people may want to)
- Chapstick
- Sunscreen
- Hand sanitizer
- Sanitizing wipes (for cleaning your cooking gear)
- Small thing of tissues (there are outhouses in the campground and we never ran out of toilet paper, but just in case– bring these)
Those are most of the things that I brought that helped my trip be a bit more enjoyable. We had a really, really great time and actually found we overpacked food and clothes.
Someone in our party brought a water filter, but honestly, we didn’t use it. The water from the springs is clean and there really isn’t any place to fill up on water on the trail.
We didn’t bring a camelbak for this trip because the temperature was mild and we didn’t need as much water as you would if you were going in the summer.
If you are going in the summer, you can reduce your pack list by bringing a sleeping hammock. We would have loved that if the weather permitted.
You might be wondering is. the hike down to Mooney Falls as scary as it seems?
This really depends on who you ask.
One person in my party didn’t feel comfortable making the climb down and I can totally see why. If you have a fear of heights, you will HATE this.
It’s steep; combined with Mooney Falls having lots of mist on the already slick rocks going down, it’s a fairly scary combination.
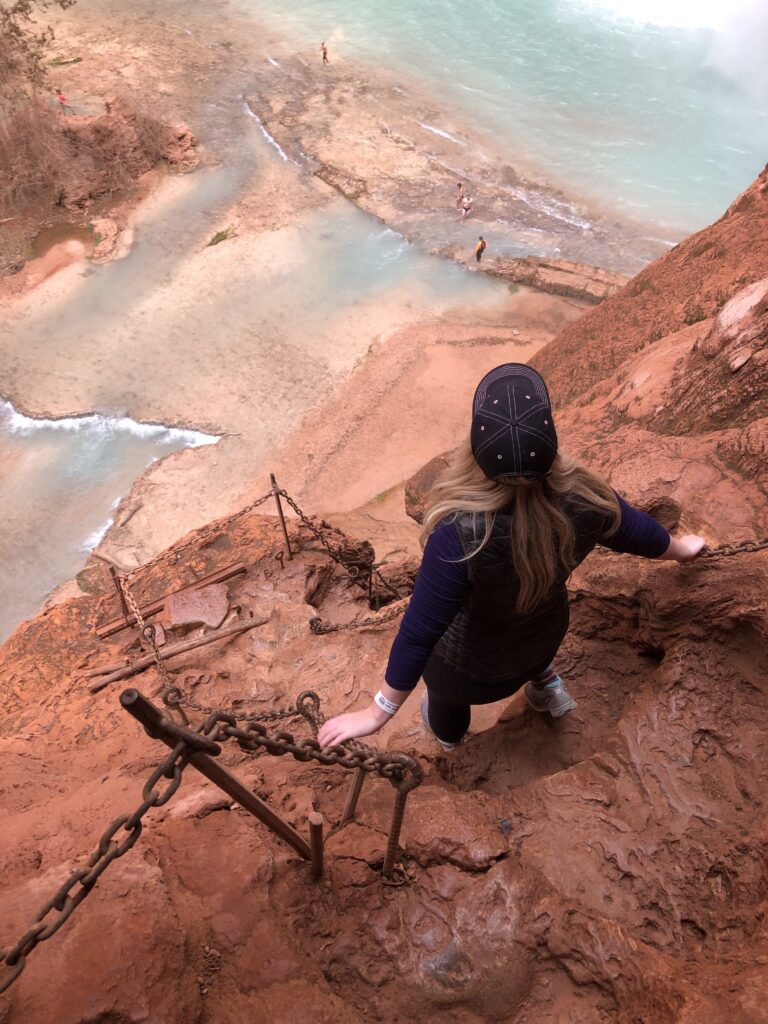
The other freaky factor is the chains that help you up/down, spin in their holes adding to the concernment of “are these actually safe?”
There are body baskets at the bottom just in case someone falls and needs to be transported out– which adds to the reminder that one slip and you will be hurt.
We made our way down and thought it was worth it. Take your time, don’t be an idiot and refrain from trying to take pictures. Just take your time and go at your own pace!
We found that the climb up was just that- a climb. I’m not going to lie, I was a little out of breath when I got to the top. And my knees were shaky. I really don’t enjoy heights as much as some others, but I can make do.
Havasupai Summary
This trip was worth every single penny and will stay in my memories forever. It was incredible. I’ve never been somewhere quite like it. You feel as if you’re in a desert oasis. When you go, you’ll see it’s no surprise it’s such a popular spot.
Sunrises and sunsets are magical, the colors are surreal, and you can just take it all in one moment at a time. Worth it 100% if you have the chance!
Impressive post! Appreciated all the detail. Not sure about that hike to Mooney Falls. Looks intense!
Thanks David! I’m glad it was helpful. Yeah… the hike to Mooney is a bit scary, but so so worth it! I hope you go! (and invite me!)😂