The time finally came. Our washer and dryer crapped out on us. As budget and environmentally conscious consumers, we called an appliance repair company and they confirmed– the drum in our washer couldn’t be repaired, it was best to replace.
This led to new appliance and because our space is somewhat compact already, we decided to do stacked washer and dryer.
I’ve since learned stacked appliances are quite a hot topic with strong opinions! Hahah!
One thing about me, I love a DIY project. Like LOVE one. But I always want to do things in phases and on a budget.
So started the budget friendly laundry room makeover.
Budget Friendly Laundry Room Makeover: The Concept
Lately, I’ve been very into moody rooms and color drenching the entire space. Color drenching is essentially taking the color to the ceiling and walls for a huge impact.
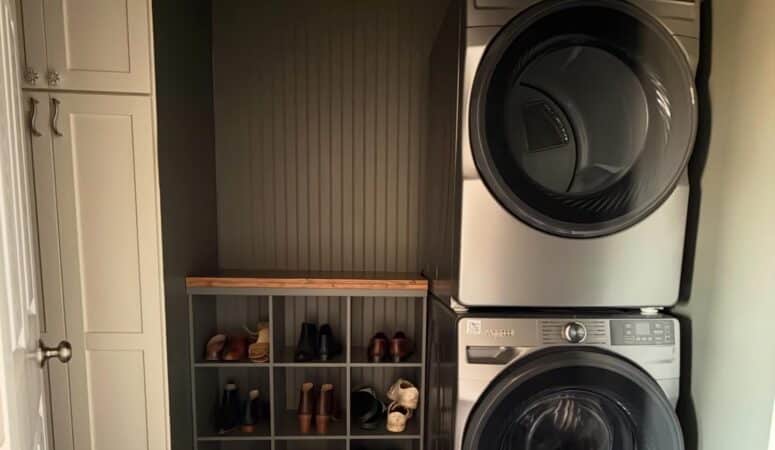
We were starting at an embarrassing level, but had a few good things going in our favor:
- The cube shoe bins were great for how we use the space
- The stacked washer and dryer made for more space, but now had a slightly awkward layout
- Our laundry room has a door and is fully closed off from our living room and kitchen

My Laundry Room Wishlist/Vision
I knew that I wanted more closed storage, and would need to keep at least one of the shoe cube shelves for our commonly worn shoes.
I also knew that I had to be creative with hiding the hoses and cords while keeping them accessible in the event of maintenance.
We don’t often fold our laundry in the laundry room, so I don’t currently need a clothes hanging rod or an iron. But I wanted the option to add that later if needed.
I wanted simple, clean, and moody with closed storage and easily accessible for kicking off shoes at the end of the day.
Laundry Room Floors
While I would have loved to rip out the old linoleum and invest in some beautiful tile flooring, this just wasn’t in the budget and frankly, wasn’t in my energy load either. As a first-time mom, I’m super low on energy! If you know, you know.
I have had some success with using peel and stick floor tiles so I decided to go that route. They historically have lasted really well for me and provided a huge impact, with a low budget.
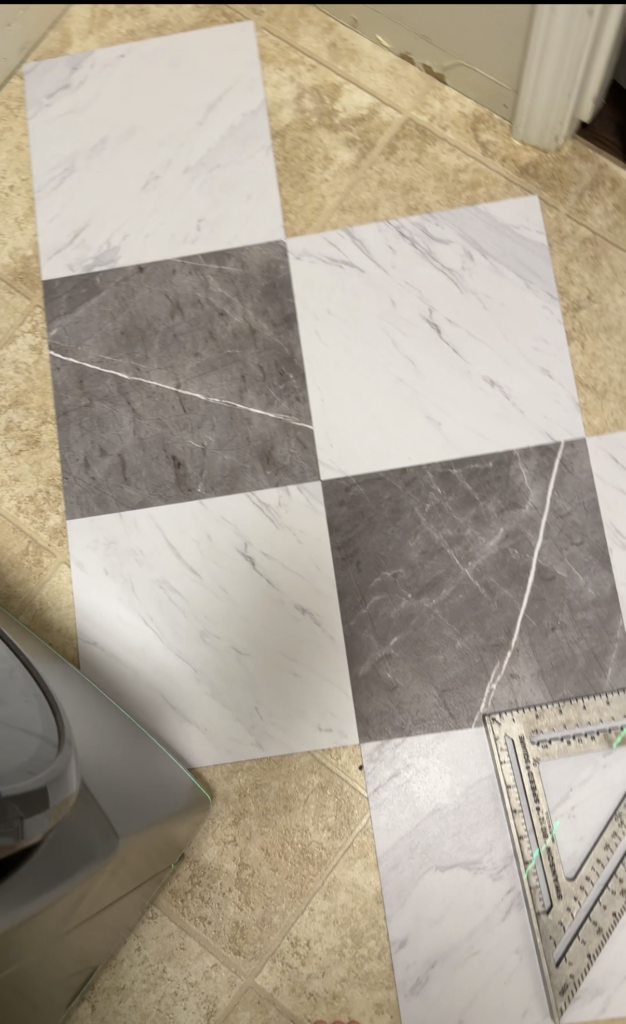
On social media I’ve been admiring the checkered marble tile look, so I decided to give this a try.
These are the exact peel and stick tile I used.
These were super budget friendly- like $20-$25 per box. I purchased 3 boxes and had some left over.
Tips For Installing Peel and Stick Floor Tiles
My biggest tip to installing these?
After cleaning your floor very well, lay out the tile across the entire room to see where you may need to make cuts and how things will line up. I adjusted so that the tile would look centered when I peeked through the door and went from there. This takes a bit of playing around with but you can always find center of your room, make a mark, and use that to help you place your first tile.
I also used a speed square to keep things perfectly lined up.
Once I got the first few in place, the rest went very fast. It’s a pretty easy project that moves quickly.
The Laundry Room Cabinetry and Countertop
For the tall cabinet in our laundry, I found a deal on Facebook Marketplace where someone was selling a 94″ tall pantry cabinet from their home for $150. I knew this cabinet was a killer deal since similar ones were around $500+ brand new.
I did have to build a base for the cabinet to sit on with 2x4s and had a bit of space at the top for crown moulding to give it a more built in appearance.
For the cube shoe shelf, I built a 2×4 base for that to sit on top of as well. Since I needed some space for hoses and water lines for the washer and dryer, I made sure that the shoe cubes didn’t touch the wall and that there is a sizable space behind the cubes so nothing is kinked or compressed.

Then I played around with a counter top that was leftover from a previous project.
The boards I used for the counters were 2 project boards that were glued together and stained in the color Early American by Minwax and sealed with 3 coats of Polycrylic for durability.
I just had to cut it down to size and place it on top of the cube storage bins. Easy peasy!
Thankfully, the height of the shoe shelf and the counter top hid the cords perfectly.
I tacked on some bead-board wainscoting for the back of the cube bin and placed a couple screws to the base 2x4s to secure in place.
The Laundry Room Wall Paneling and Paint Color
I needed to purchase 1 sheets of bead-board wainscoting for the wall and cube shelf, which was pretty budget friendly around $30 for a panel.
If you’re new to wainscoting, it’s quite easy to install. I didn’t run the bead-board the entire length of the wall and stopped a bit below where the countertop would hit. This saved a bit on costs and still make a statement impact.
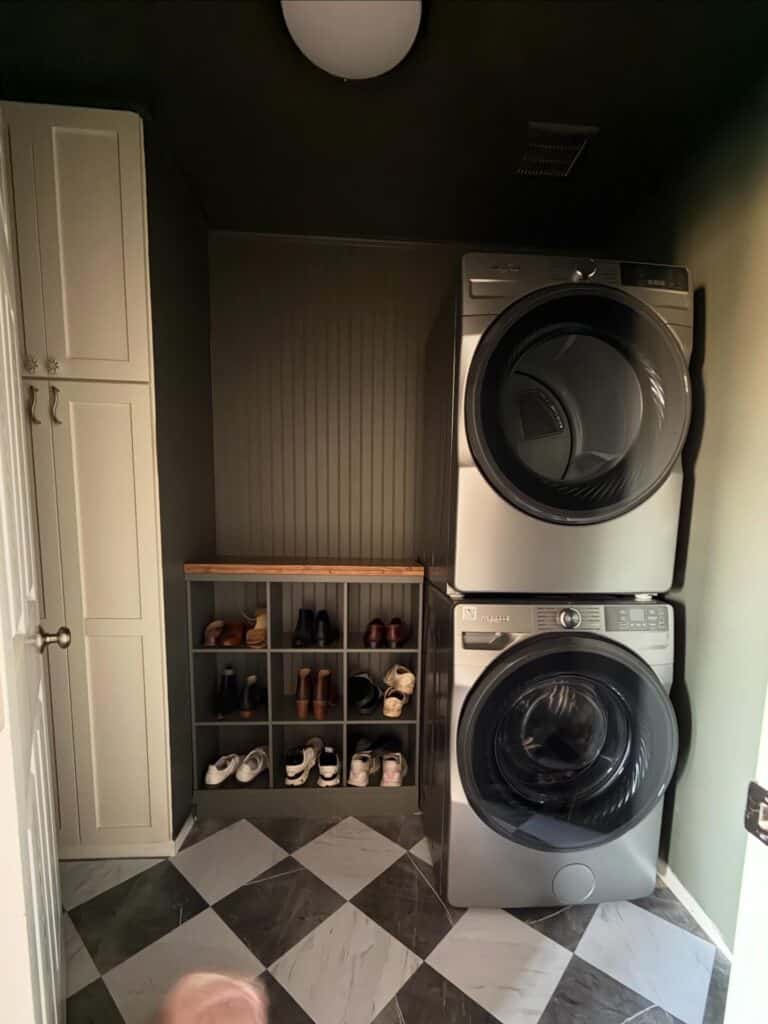
The room is color drenched in Sherwin Williams Thunderous.
It’s a moody, deep beautiful greenish gray.
Tip For Painting Cube Storage Bins (Glossy or Finished Surfaces)
The biggest tip for ensuring paint lasts and is durable for surfaces that are slightly glossy or finished (like Ikea bookshelves), is to use a good scuff sand with 120 grit sand paper and then a primer coat for a shellac based primer.
My go-to primer for slick surfaces is this one.
Once you prime, you’re able to do your normal 2-3 coats of paint with a foam roller designed for cabinet doors. Let that dry completely and add 2-3 coats of satin or matte polycrylic to the shelves. Because this was specifically used for shoes, I opted for 3 thin coats with very light scuff sand in between using 220 grit sand paper. After the third coat I didn’t sand and just let dry for 72 hours before I put any shoes on there.
Total Cost of My Laundry Room Makeover
| PRODUCT | COST |
| Pantry Cabinet | $150 |
| Paint | $45 |
| Floor Tiles | $60 |
| Bead-board | $30 |
| Cube Organizer | $0- (already had) |
| Wood Countertop | $0- (already had) |
| TOTAL COST | $285 |
So for a grand total of $285 I was able to update my laundry room to be much more appealing.
Phase 2 of the Laundry Room Makeover
I still have to paint and order new hardware for the pantry cabinet, but that will come in time.
I am also looking or something to go on the wall between the washer/dryer and cabinet. Thinking perhaps a battery powered sconce light of some type or a painting, but again, this will come in time.
I’m a big fan of doing projects in phases and much prefer to tackle bits at a time instead of spending a lot of money to do it all in one sitting.
So for now, this room will do.
Now off to chase my toddler around again… wish me luck!
-Whitney