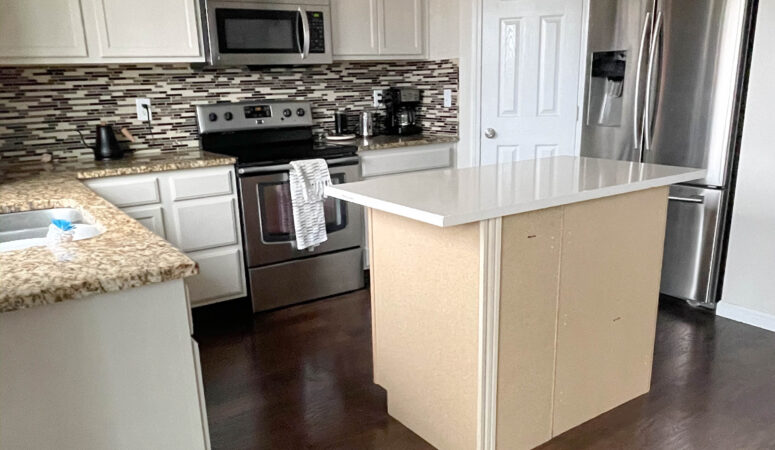
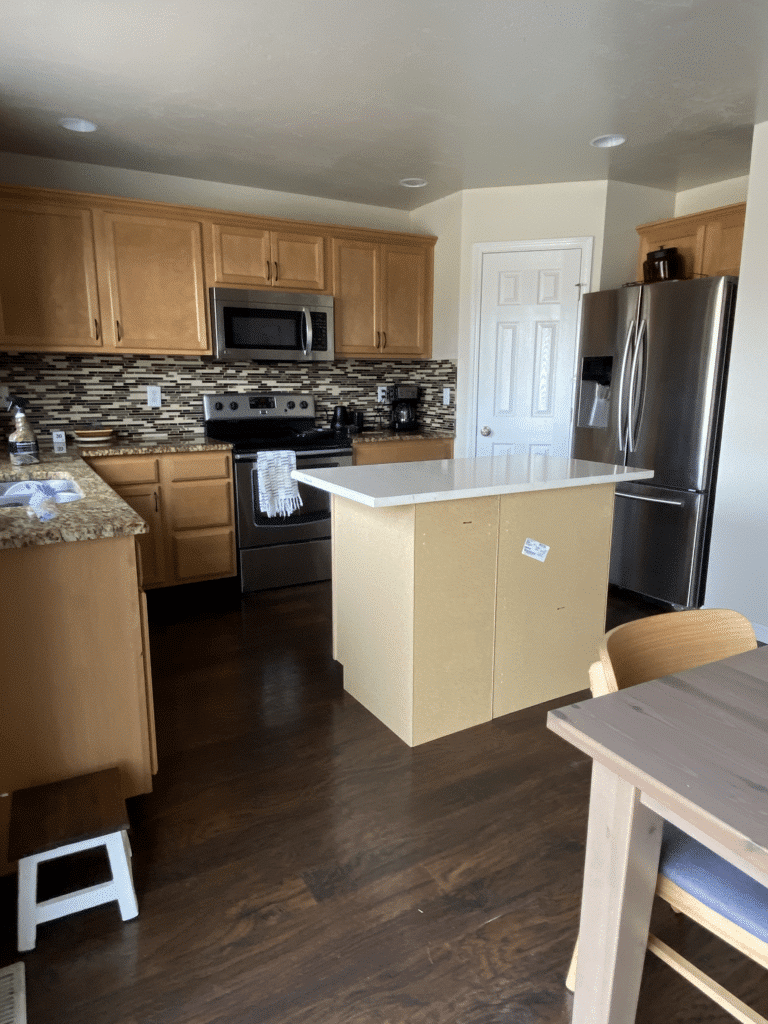
My kitchen was a bit dated.
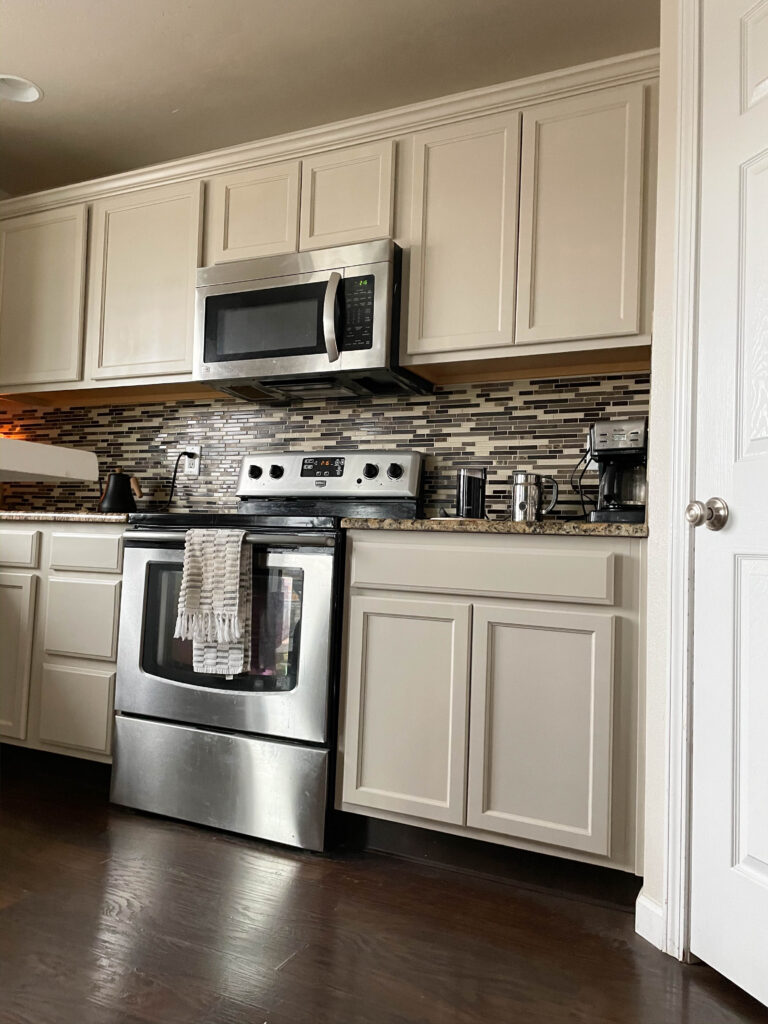
The honey colored cabinets weren’t cutting it any more.
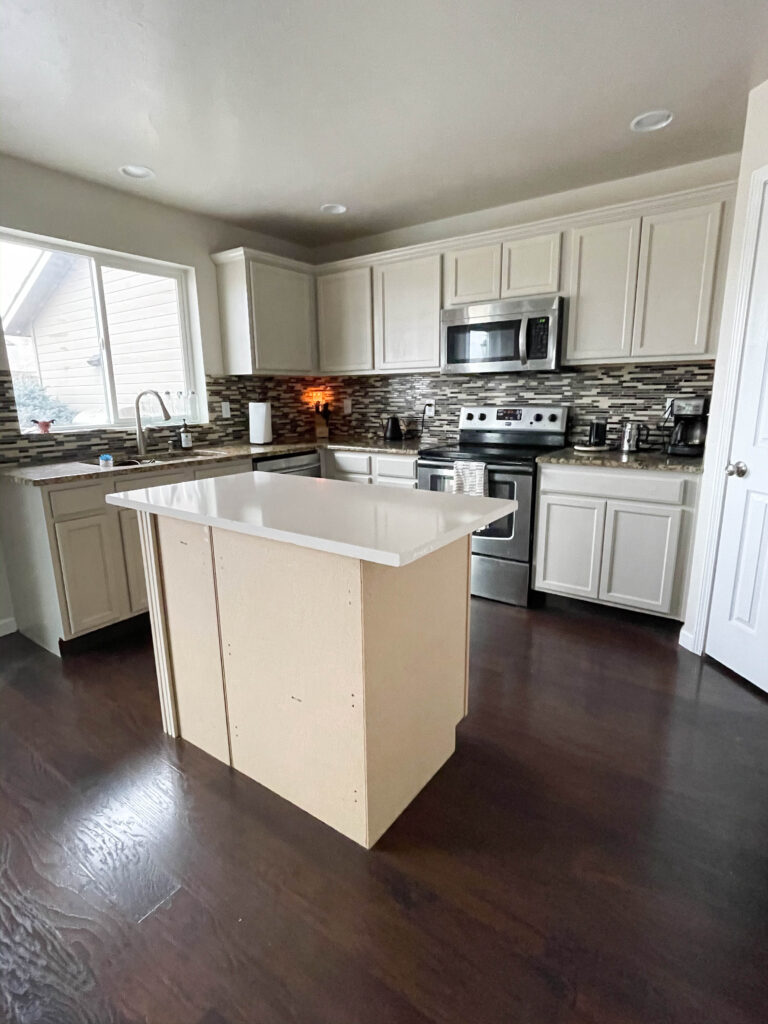
But the biggest hindrance to the kitchen was the granite color. We are considering this Phase 1 of our kitchen remodel and won’t be replacing the counter this year.
So instead we added an island with a marble slab (that I got for free on FB Marketplace) and bought some stock kitchen cabinets from Lowes to give us an idea of what the kitchen island would feel like.
Then we were ready to paint the cabinets and we did not want to sand.
We decided on a gorgeous beige-grey color from Sherwin Williams called Accessible Beige. It warmed up the kitchen a bit and complimented the granite.
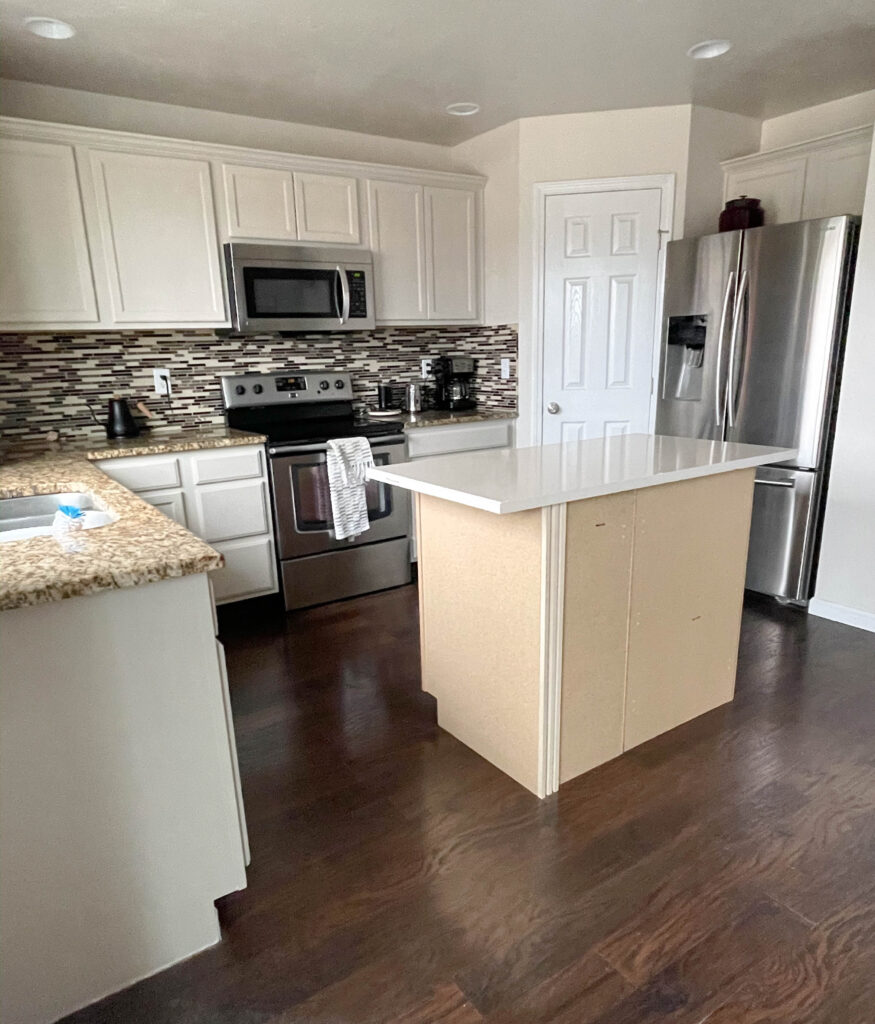
We took 5 days to repaint the cabinets without sanding, but you certainly can do it faster.
What you need:
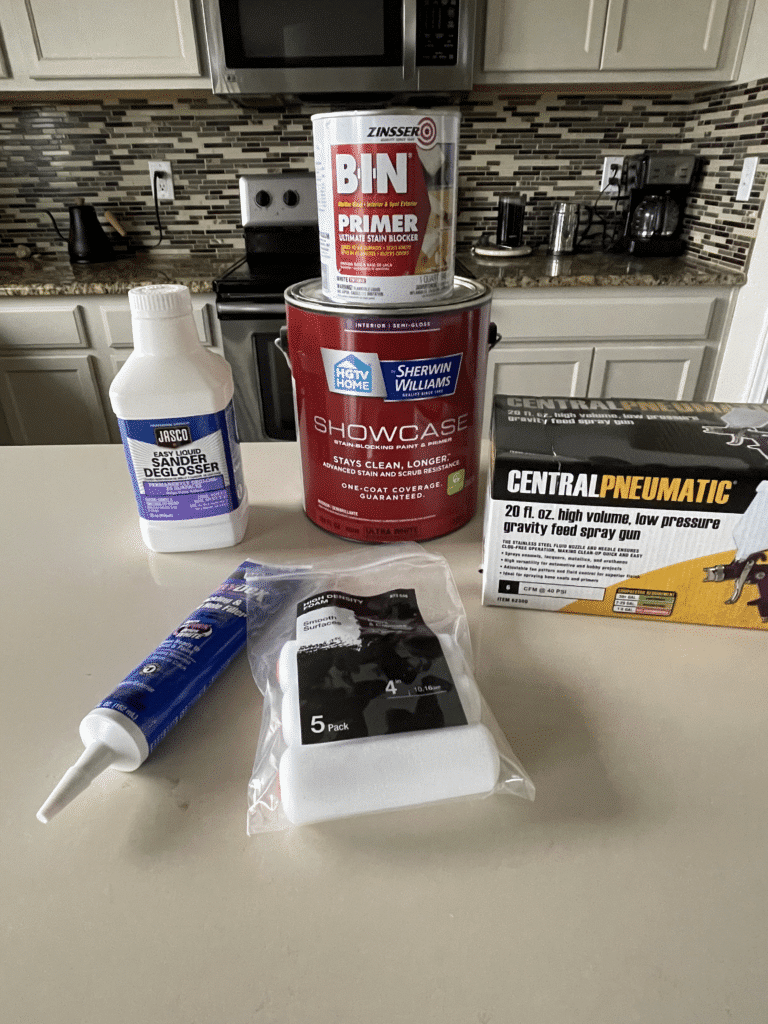
- Liquid Deglosser
- Sand paper (220 and 120 grit)
- Nail/Spackling Filler (for hardware hole if you are switching hardware sizes) this is the one I used and recommend
- 4″ weenie roller AND high density foam rollers (this one comes with a small paint tray too!)
- Paintbrush
- Painter triangles to elevate doors and drawers while painting
- FOR THE BEST FINISH: This HLVP spray gun (if you want to spray paint/primer instead of roll) and Air compressor
- 2 quarts of Zinnser Bin Primer in white (Shellac Based)
- 1 Gallon of Sherwin Williams paint in Semi-gloss (You could probably get away with 2 quarts- we used Accessible Beige)
- Brush cleaner
Step 1: Prep
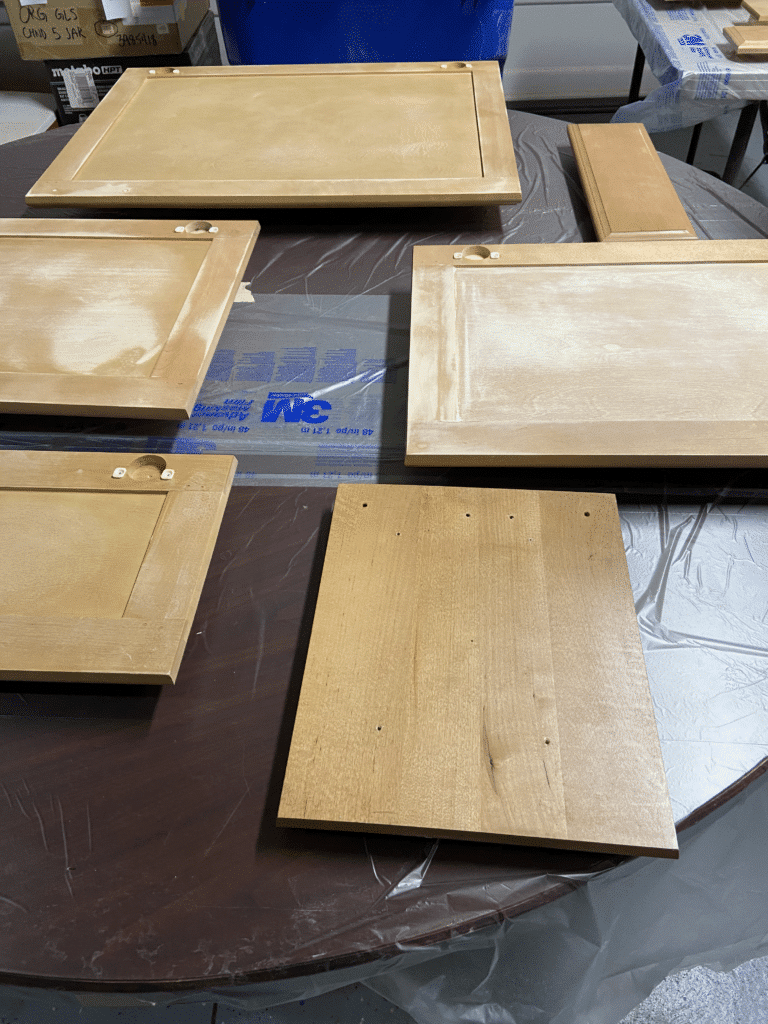
The prep work by far takes the most time and is also the most important piece. Contrary to popular belief, you do not need to sand the doors down. A light scuff is totally fine, but a good primer will grip onto the surface.
When taking your cabinets off the doors and removing hinges, I highly recommend being organized.
The hinges and doors all fit differently, so be sure to line them up. I had each hinge set placed on my counters so I knew exactly hinges went to which doors.
Organize your doors and drawers the same way. This just saves so much time when you know exactly where everything goes.
For prep work:
- Give the cabinets a good wash or use TSP if there is too much dirt/grease on the cabinets
- Fill a plastic Tupperware container with the deglosser. Wearing chemical resistant gloves use a lint free rag to apply a liberal amount of deglosser to all the surfaces of the cabinets and the cabinet frames.
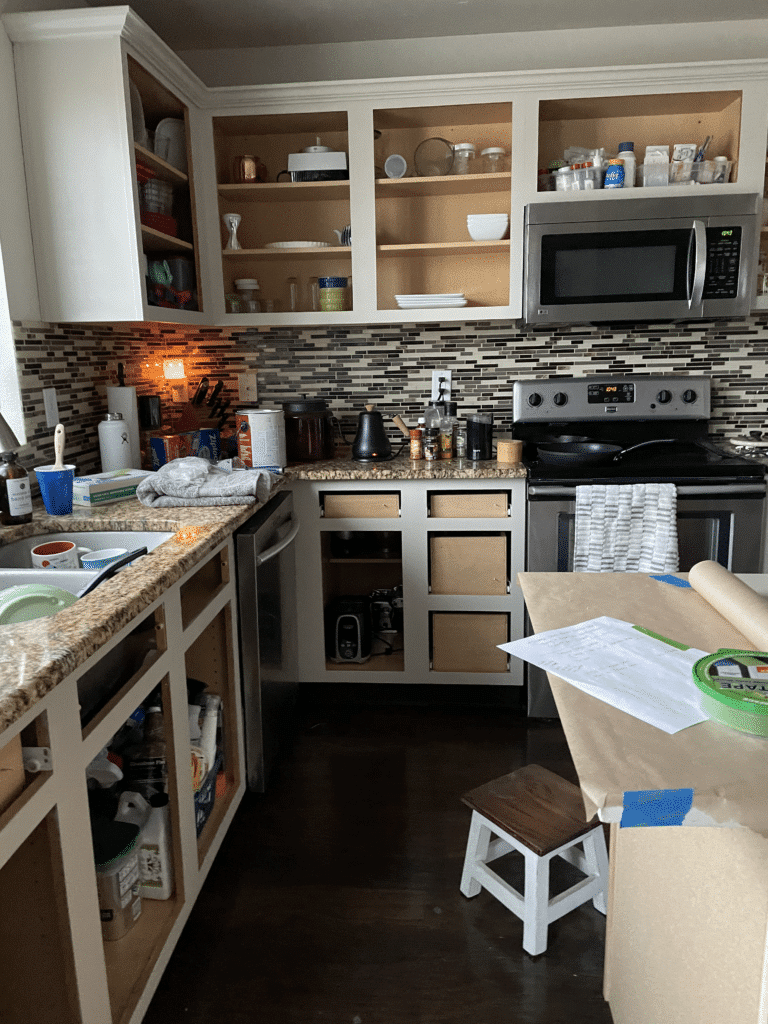
- While deglosser is doing it’s thing, mask off your kitchen walls, microwave, stove, dishwasher, floors and countertops to prep for painting
- If you are moving where your knobs or pulls are located or switching to a different size of hardware, give the cabinet a light sand over the existing holes and fill with nail filler/spackling. ( I like to the use the kind in a tube that starts as pink and turns white when it’s dry and ready to be sanded).
- Using 220 grit, sand the nail filler down until it feels flush with the cabinet. You may need to reapply and sand a couple of times.
- Use an air compressor and blow all the dust off the cabinet.
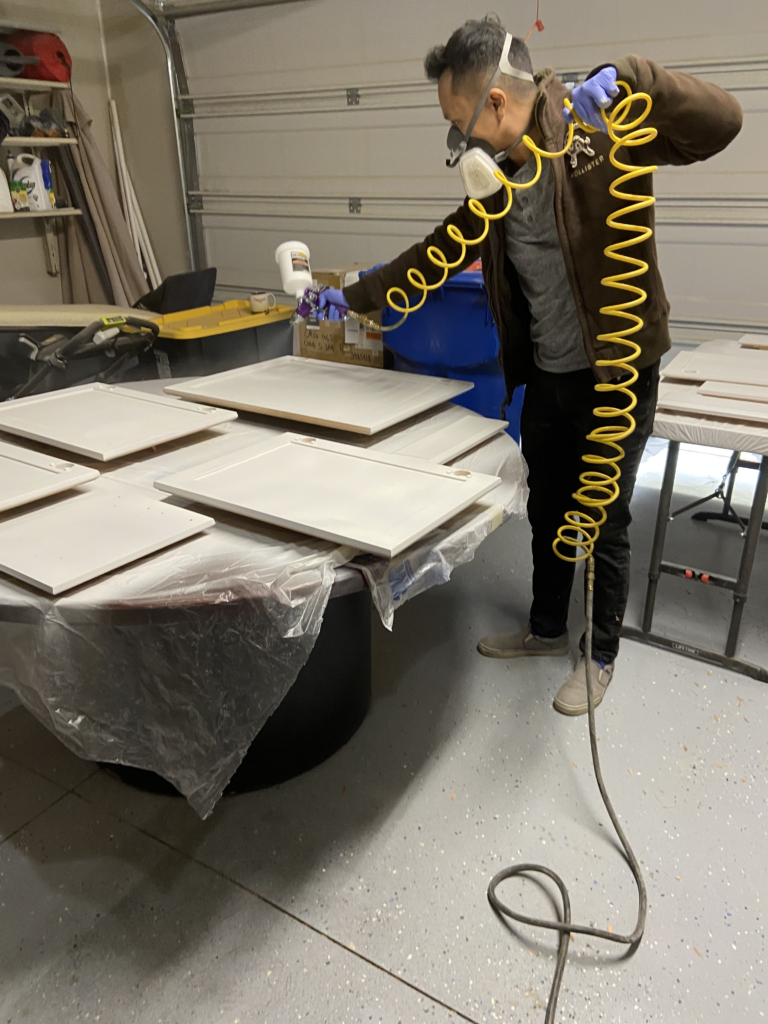
Step 2: Prime
Start prepping for priming by determining how you will apply the primer. We used the HVLP spray gun hooked up to our air compressor for our cabinet fronts and it gave it the best smooth, professional finish.
However if you don’t have one, the foam roller will work out just fine. Just make sure you use the foam roller and not the microfiber rollers.
If you are using a sprayer for your primer and paint, make sure your air compressor is big enough. Our was not (6 gallons) and it was a PAINFULLY slow process letting it get enough air in the compressor to spray 1 more cabinet. So do yourself a favor and rent one. You will be done in no time if you do.
To prime:
- Start by placing the cabinet front back side up on the painter triangles
- Spray (or roll) each piece with 2 solid coats
- Let dry for ~30-45 minutes and flip over the fronts
- Apply two coats of the primer to the front of the cabinet doors
- While those are drying (or in our case while Tony worked on the cabinet doors, I worked on the cabinet bases in the house) start rolling and brushing the primer on. (It was faster and still as effective roll the frames instead of masking everything off even more to spray)
- If using the HVLP gun make sure you clean the gun to the manufacturers specifications immediately after use so the shellac primer doesn’t ruin your gun. (We used brush cleaner).
Step 3: Paint
If you took your time on prep and priming, then painting is a breeze!
The entire finish relies on your primer coat! We noticed we had small bumps in the primer coat, so we used 220 grit sandpaper and very lightly sanded those areas smooth.
To paint:
- Using your roller or spray gun, apply a light and even coat of paint to the back side of the doors first. (remember, always paint/prime the back side first so the fronts have less of a chance to get messed up)
- After the first coat of paint dries, allow it to dry to the touch and then flip the cabinet doors
- Using the same technique, apply 2 coats onto the front of the doors, allowing the paint to dry in between coats
- Let cure 24-48 hours before installing
- Clean your spray gun thoroughly


Step 4: Reinstalling the cabinets
This part is easy peasy if you had your hinges and doors organized.
It goes really fast!
Be careful with the paint for 1-2 weeks as the paint fully cures over time.
That’s it! It really is a quick process and not nearly as difficult as it seems to get a professional even finish.
By painting your own cabinets, you will easily save yourself anywhere between $1,200 and $7,000 depending on the size of your kitchen.

How to build up a savings (without doing any work)
Enter your name and email to get access to the training instantly.
(link will be sent directly to your email)